

Sensitive nationalities
Overview
End-users with sensitive nationalities must provide two ID documents to complete the identity onboarding step:
- The first ID document must be issued in the Schengen area.
- The second document must be the passport, to prove the personal information
The first document can be uploaded either through the webview or by API, depending on the workflow used (electronic_sign or Identity). The second document, however, can only be uploaded via API.
Enduser Journey
The first steps of the identity diligence are the same: upload or scan the ID document.
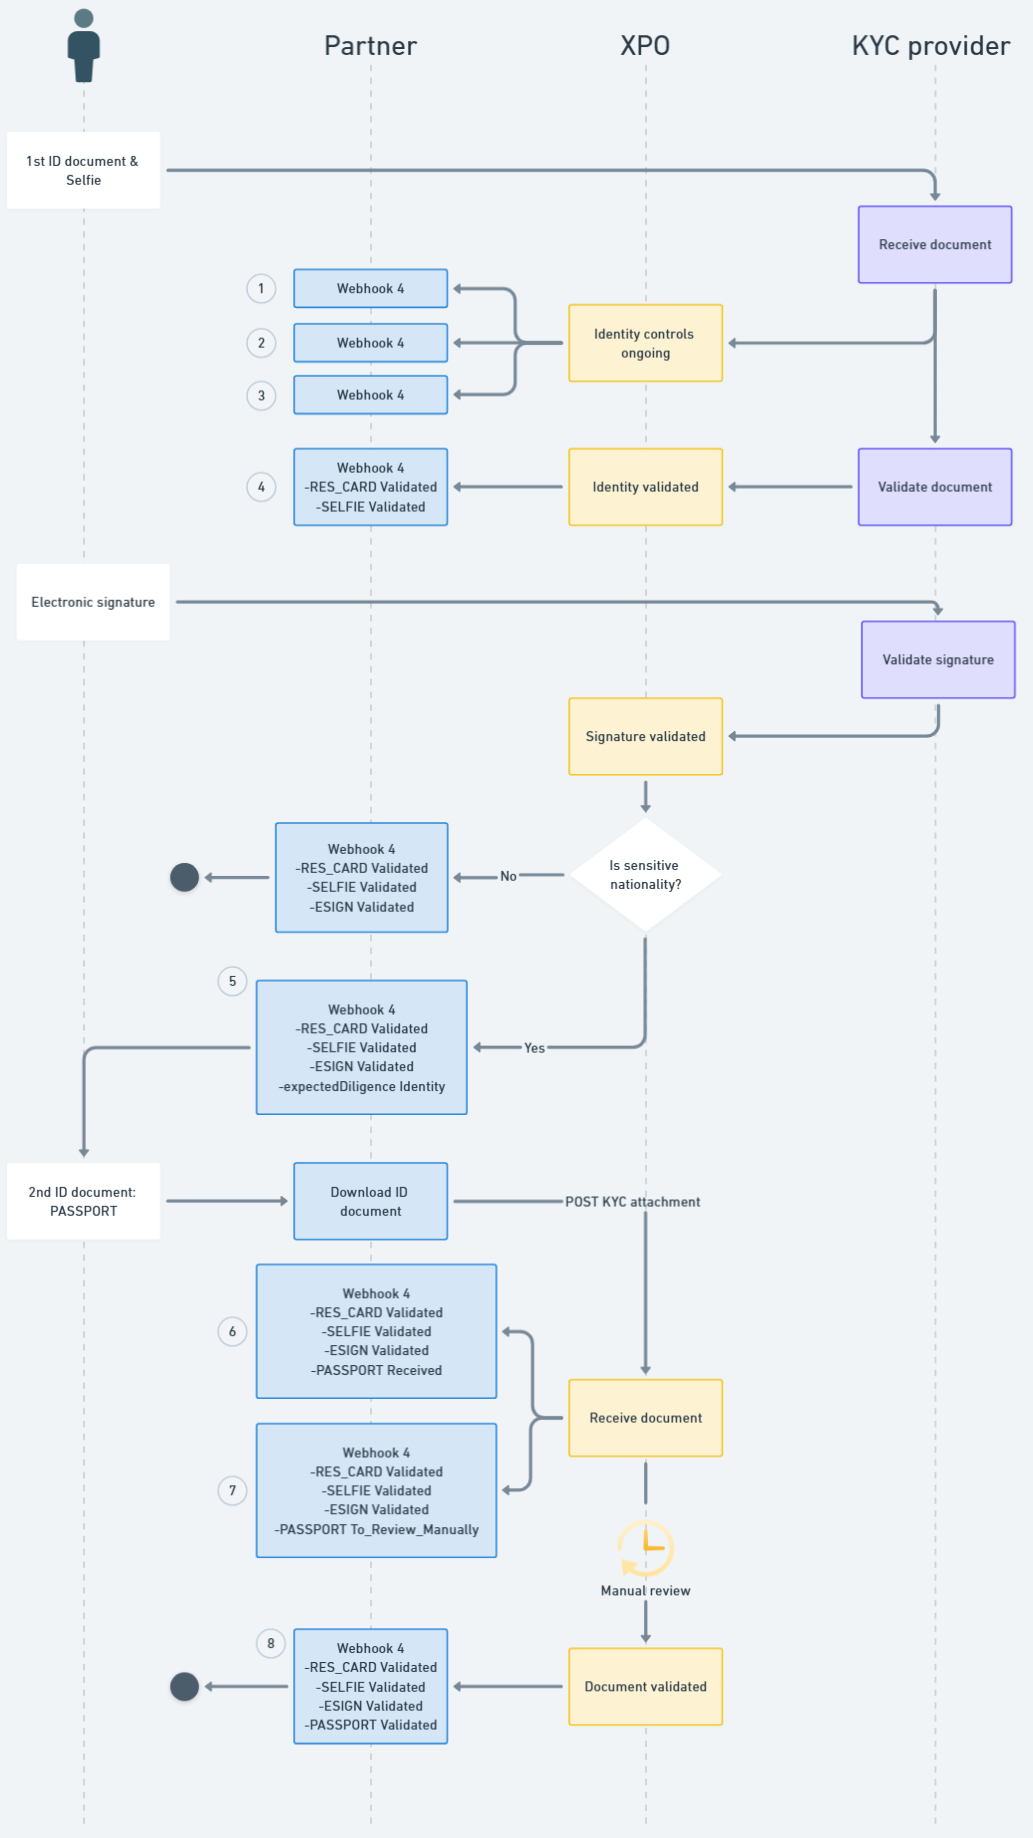
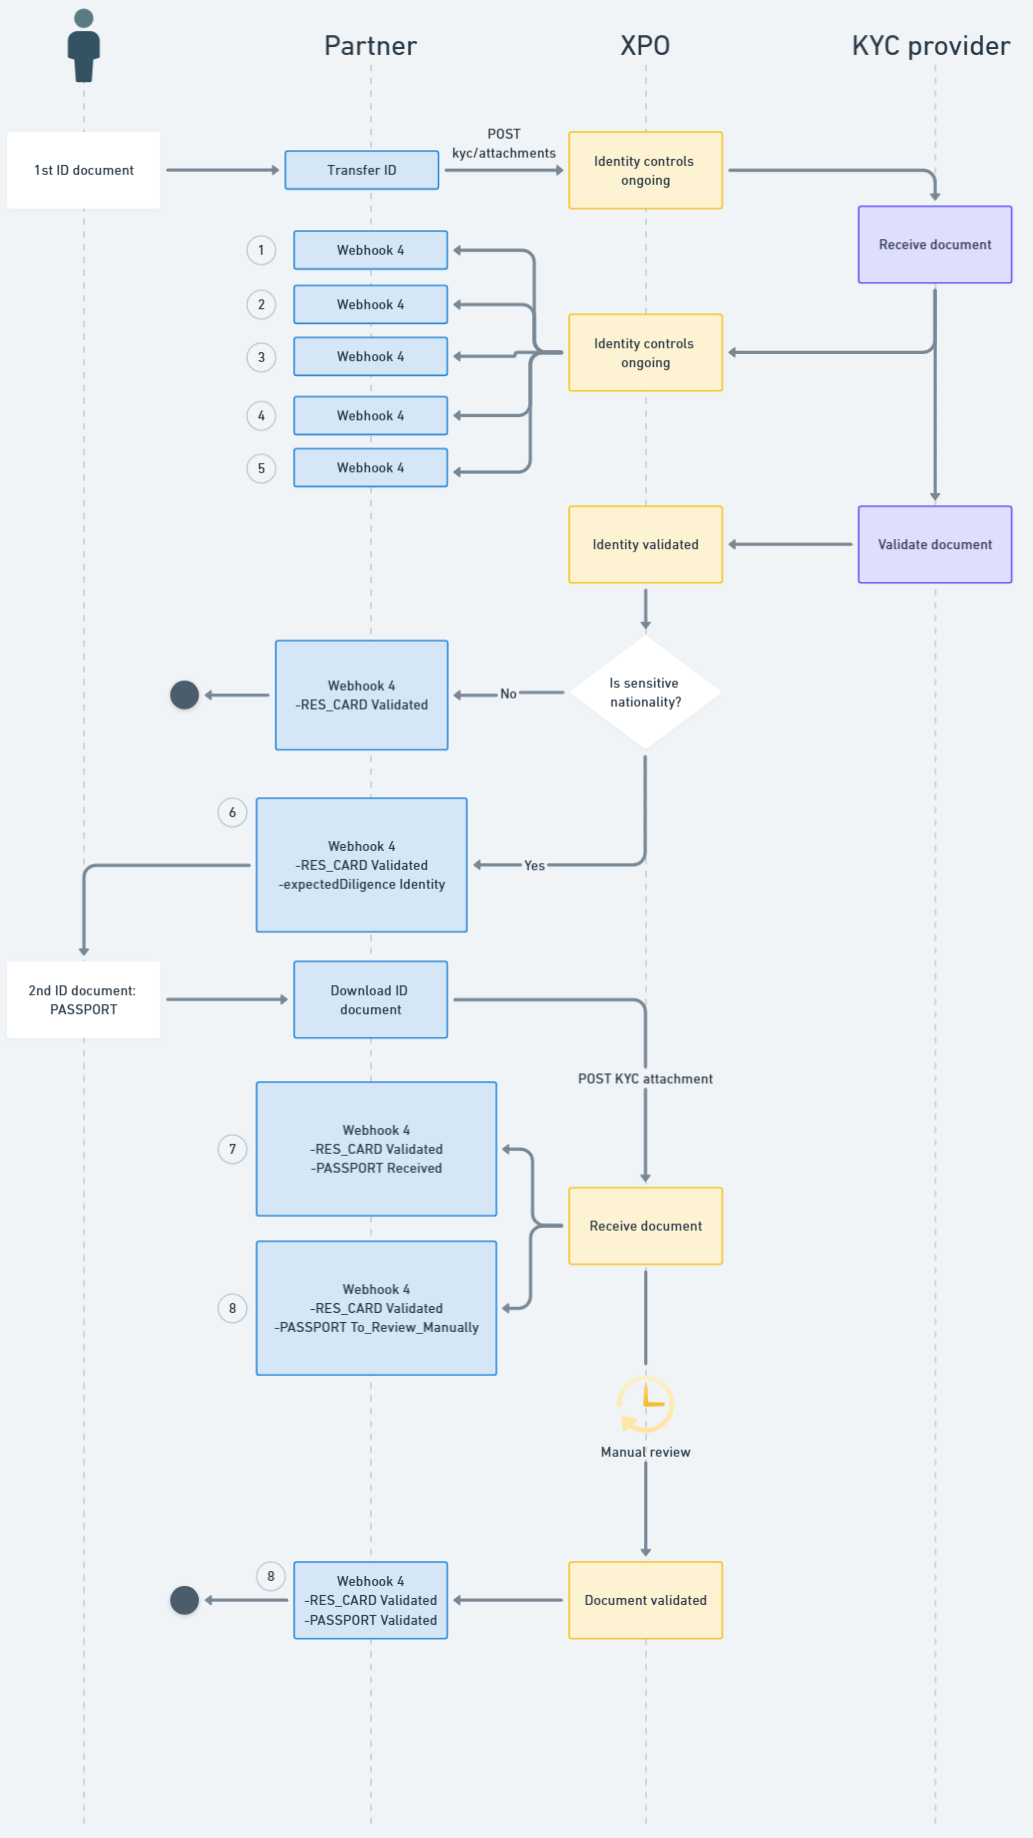
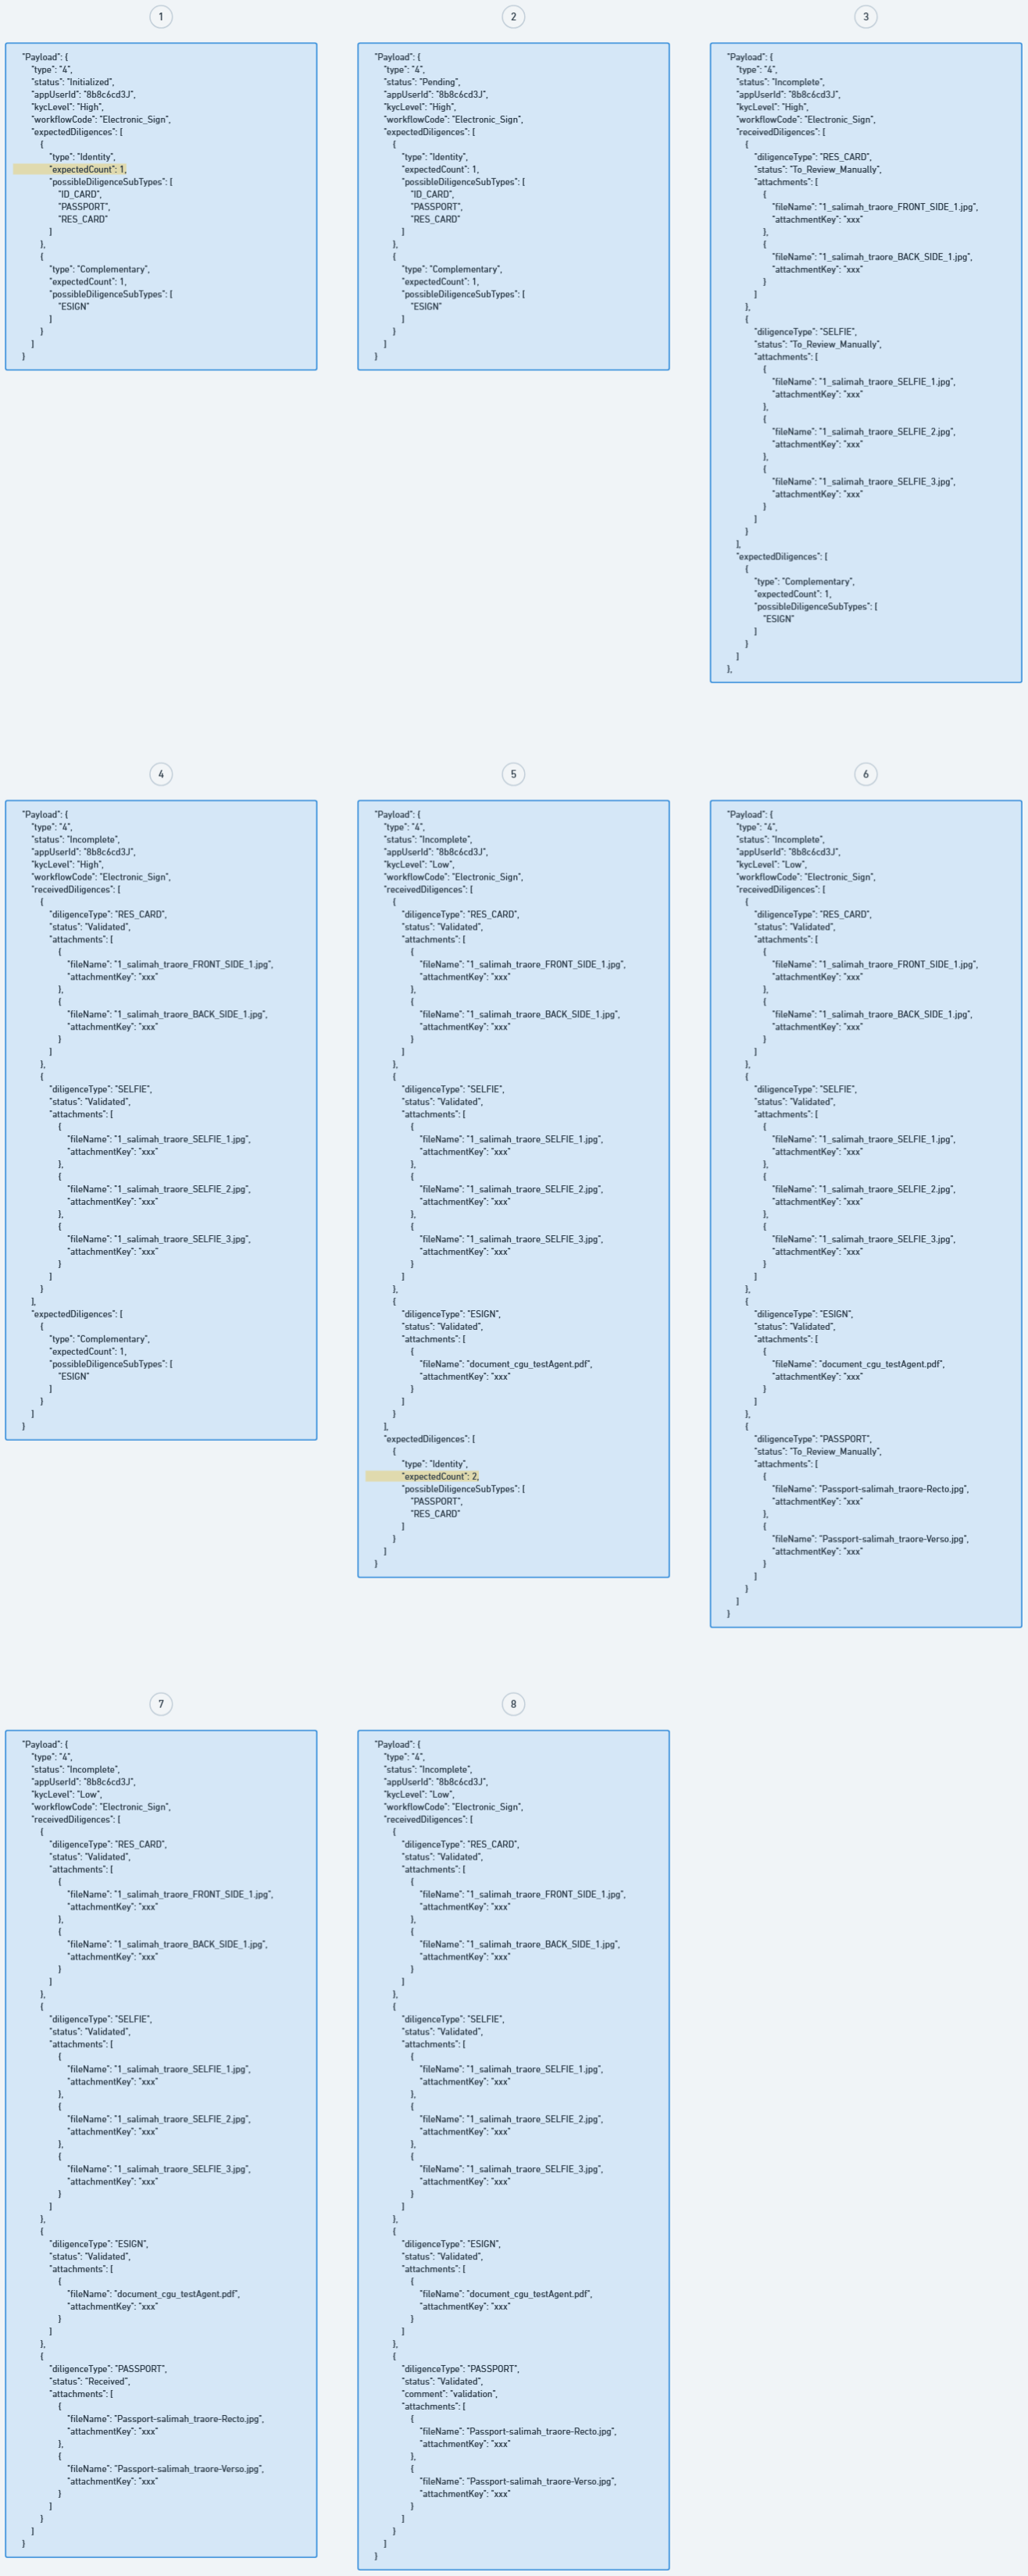
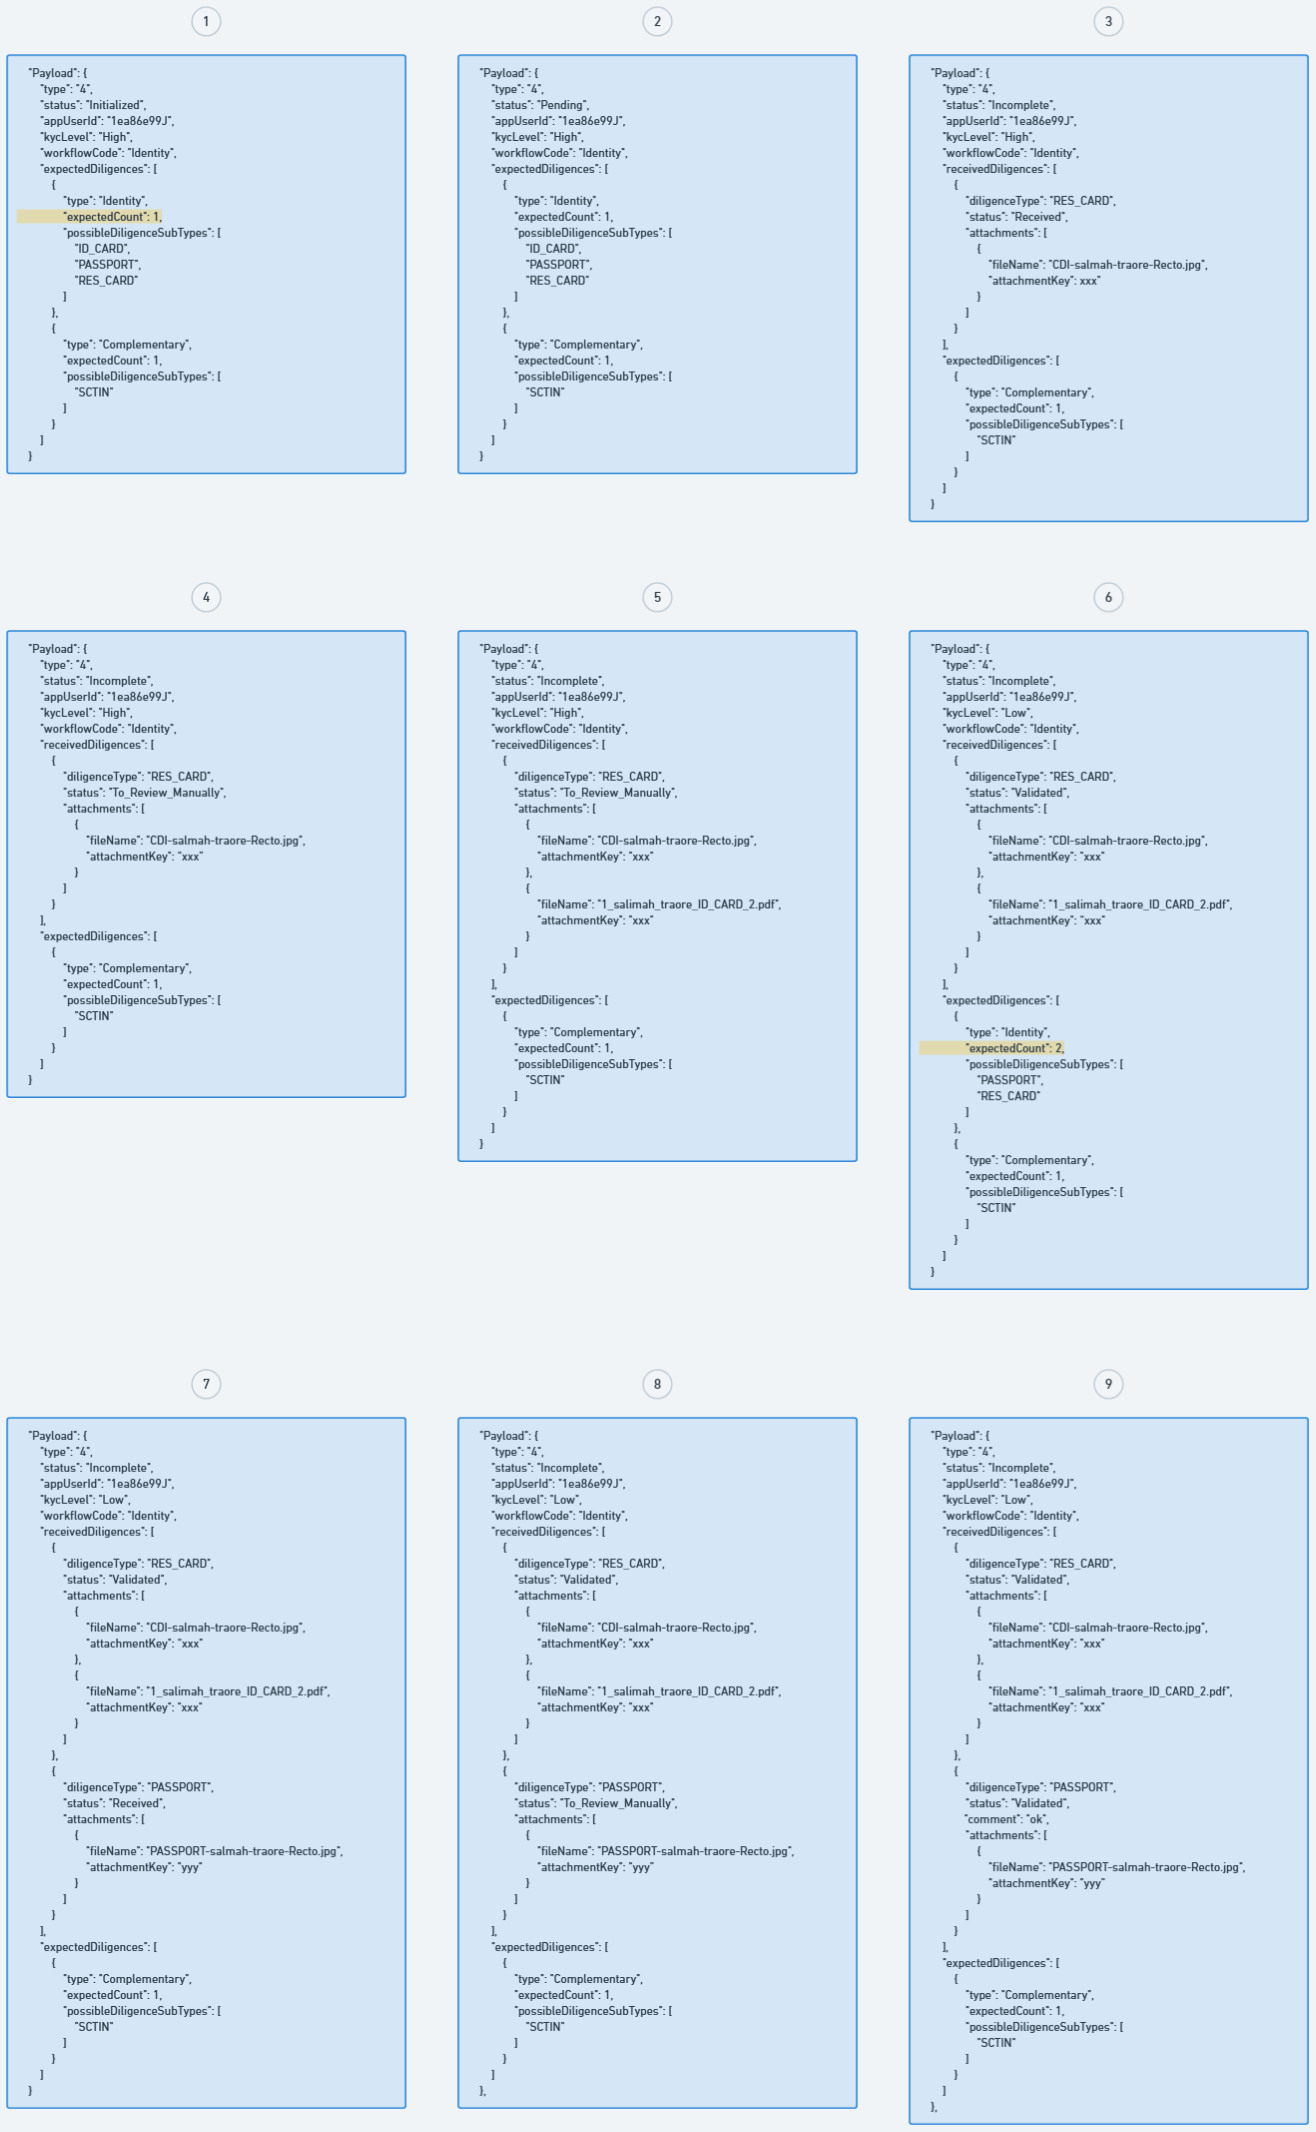
Once the document is available, the KYC provider can confirm the end-user’s nationality. If this nationality is considered sensitive by Xpollens, an additional step is required. In expectedDiligences, for Identity, the expectedCount value changes for 2.
The second ID document is validated manually, not automatically. The validation occurs within 48 working hours.
The second ID document must be the passport.
Electronic_sign
Identity
Best practice
- If a sensitive nationality is detected during the POST /user request, you can immediately request a second ID document.
- Otherwise, prepare a screen during onboarding if the nationality read and validated by our KYC provider is considered sensitive.
List of Sensitive Nationalities
This information cannot be shared publicly. Please ask your Customer Integration contact to provide it.
How to test
Create a user using this body
POST /v2.0/users
{
  "appUserId": "{{appuserid}}",
  "profile": {
    "civility": "Mrs",
    "firstName": "Salimah",
    "lastName": "TRAORÉ",
    "birthName": "TRAORÉ",
    "birthDate": "1988-01-01",
    "birthCity": "MATAM",
    "birthZipCode": "CD",
    "birthCountry": "CD",
    "nationality": "CD",
    "phoneNumber": "+33601020304",
    "email": "{{firstname}}_{{lastname}}[email protected]",
    "address": {
      "street": "18 rue de bruxelles",
      "supplementIn": "Access by the garden",
      "supplementOut": "Corner House",
      "zipCode": "59000",
      "city": "Lille",
      "country": "FR"
    }
  }
}
Then create the KYC:
POST /v3.0/users/appuserid/kyc/demand
{
   "workflowCode":"Electronic_Sign"
}
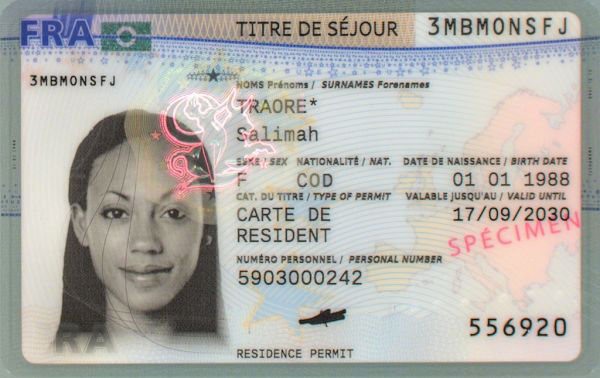
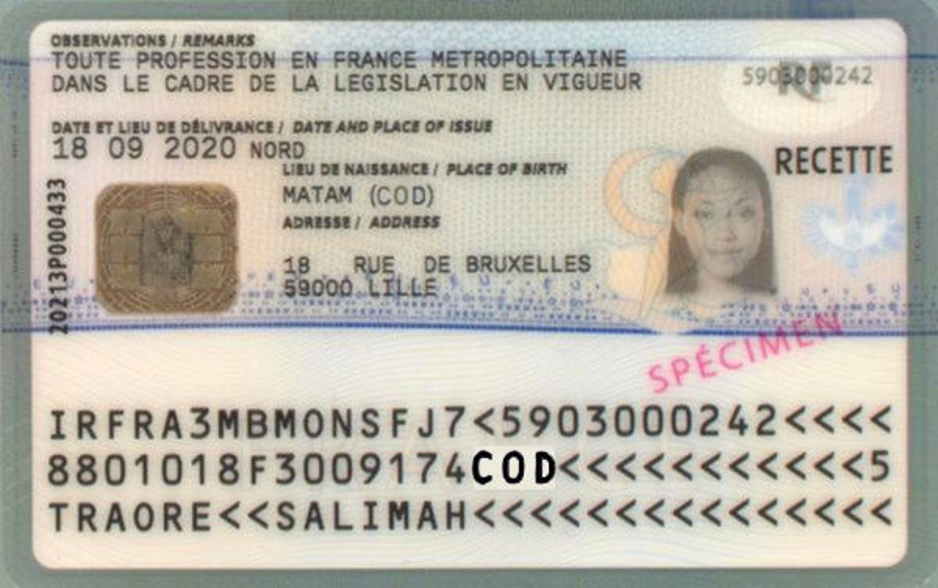
Using the webview, scan the following ID:
Webhook 4 diagram for ESIGN worfklow
Electronic_sign
Identity
Updated 3 months ago